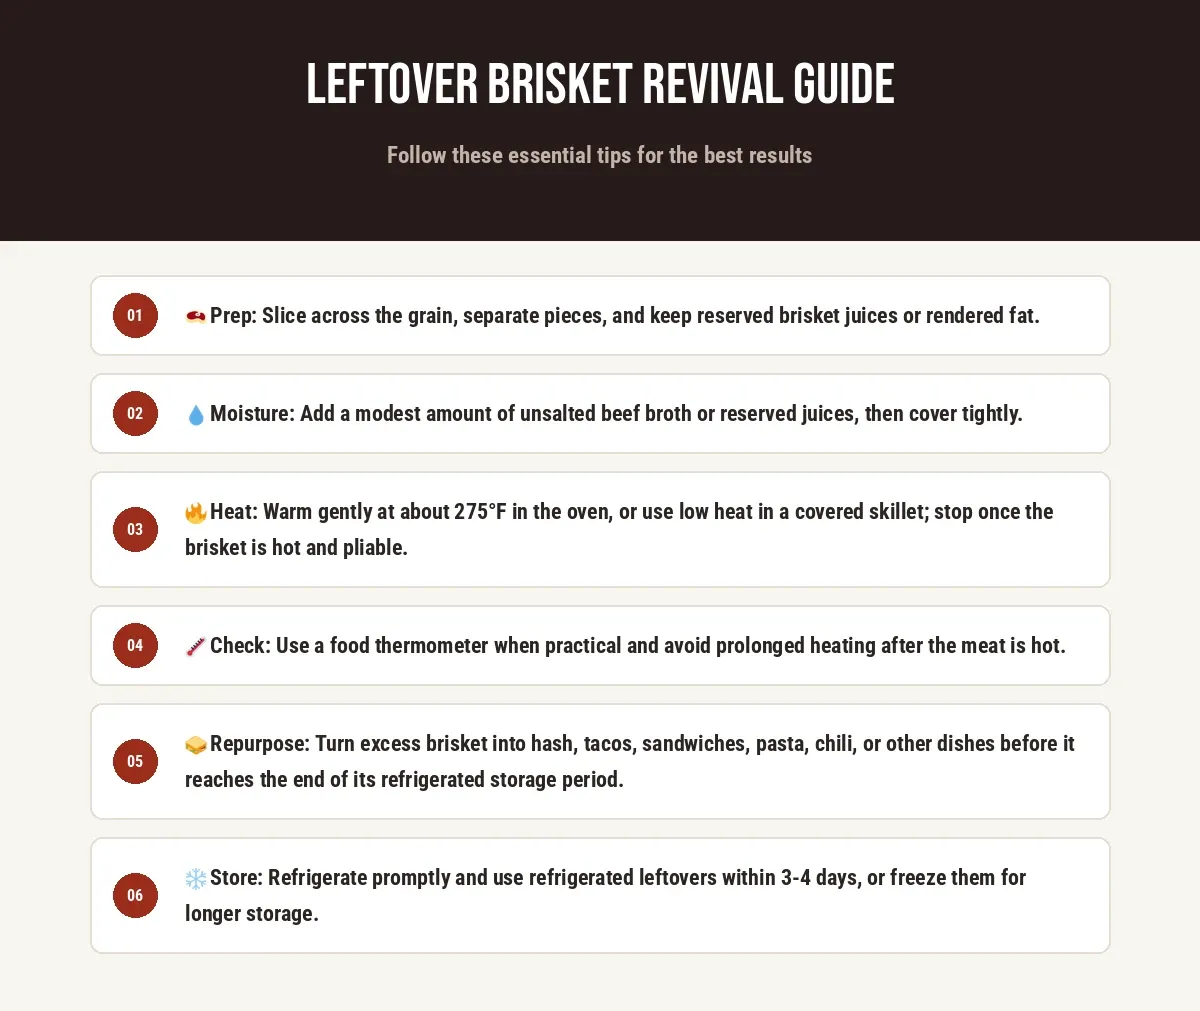
Leftover brisket can be excellent the next day, but careless reheating can turn tender slices into dry, chewy meat. The goal is not to cook brisket again. It is to warm it slowly while replacing the moisture that escaped during its first cook and its time in the refrigerator. The best approach depends on whether the brisket is sliced, chopped, or stored as a larger piece, but gentle heat and added moisture are the two constants.
For the best results, keep brisket intact during storage whenever possible. A whole piece loses less moisture than thin slices because fewer surfaces are exposed to air. If you already have sliced brisket, store it with any accumulated juices, rendered fat, or sauce. Those liquids become valuable during reheating and help protect the meat from drying further.
Why Leftover Brisket Loses Its Texture?
Brisket is a collagen-rich cut that becomes tender during its original low-and-slow cooking process. Heat gradually converts connective-tissue collagen into gelatin, while the meat’s muscle fibers lose some of their water. During refrigeration, the gelatin and rendered fat firm up, so cold brisket naturally feels denser and less supple than it did when freshly cooked.
The bigger problem comes from reheating too aggressively. Muscle proteins contract as their temperature rises, squeezing out additional moisture. Thin slices are especially vulnerable because they have a high surface-area-to-volume ratio. A hot skillet, microwave, or oven can push the outer layers well past the temperature needed simply to warm them, causing more moisture loss and making the meat firmer.
Brisket also contains rendered fat and gelatin that solidify when chilled. Gentle reheating melts these components again, restoring some of the soft, juicy texture. Rapid, dry heat does the opposite: it drives off water before the interior has warmed sufficiently. That is why reheating brisket covered, with a small amount of liquid, generally produces better results than placing naked slices in a hot oven.
Step-by-Step Revival: A 3-step Guide
Step 1: Prep
Slice cold brisket across the grain if it is still in a large piece, keeping the slices reasonably thick rather than shaving them paper-thin. Arrange the slices in a single, slightly overlapping layer in a shallow baking dish or heatproof container. If the brisket is already sliced, separate pieces that have stuck together so the added moisture can reach their surfaces evenly.
Save every usable drop of brisket juice from storage. Remove any large pieces of hardened fat only if you do not want them in the finished dish; otherwise, leave rendered fat in place because it melts during reheating and contributes flavor and richness. For chopped brisket, spread the meat loosely rather than compressing it into a dense mound.
Step 2: Moisture
Add a small amount of unsalted beef broth or reserved brisket juices to the dish. For extra protection, add a teaspoon or two of rendered beef fat when the brisket is particularly lean or dry. The liquid should moisten the bottom of the dish rather than submerge the meat. For about 1 pound of sliced brisket, start with roughly ¼ cup of broth or reserved juices.
Cover the dish tightly with foil or a lid. The trapped steam keeps the surface from drying while the liquid warms. If your brisket already has a strong barbecue sauce coating, use unsalted broth or its own juices rather than adding more sauce at this stage; excessive sauce can mask the smoked flavor and make the bark soft.
Step 3: Heat
For sliced brisket, use a covered oven at about 275°F. Heat until the meat is steaming hot throughout and bends easily when lifted with tongs rather than cracking or breaking apart. A small portion may need only 10-15 minutes, while a larger covered dish can take 20-30 minutes or longer. Avoid leaving it in the oven after it has reached serving temperature.
For a quick serving, a covered skillet over low heat works well. Add a splash of broth, arrange the brisket in the pan, cover, and warm gently. A microwave can work for small portions if the meat is covered and heated in short intervals, but it is easier to overheat individual slices. The exact time varies with portion size, refrigerator temperature, container shape, and equipment, so use texture and internal temperature rather than the clock alone.
| Reheating method | Typical setting | 1 serving | 2-4 servings | Best instructions |
|---|---|---|---|---|
| Covered oven | 275°F | 10-15 min | 20-30 min | Add ¼ cup broth or juices per pound, cover tightly, and heat gently until hot and pliable. |
| Covered skillet | Low heat | 5-8 min | 8-12 min | Add a few tablespoons of broth, cover, and turn slices once if needed. |
| Microwave | 50-70% power | 30-60 sec intervals | 1-2 min intervals | Add broth, cover loosely, heat in short bursts, and rotate or rearrange between intervals. |
| Steam-assisted oven | Low-temperature steam | About 8-12 min | About 12-20 min | Use gentle steam with the brisket covered or protected from direct condensation. |
| Larger intact piece | 275°F | Not applicable | About 30-60+ min | Keep wrapped or tightly covered with juices; warm slowly until the center is hot without drying the exterior. |
3 Simple Culinary Ideas To Repurpose Leftover Brisket
Brisket Hash
Chop the brisket into bite-size pieces and combine it with cooked potatoes, onions, and peppers. Crisp the vegetables first in a lightly oiled skillet, then add the brisket near the end so the meat warms without becoming tough. A fried or scrambled egg turns the mixture into a complete breakfast or quick dinner. If the brisket is already heavily seasoned, taste before adding salt.
Brisket Tacos
Warm chopped brisket with a spoonful of its juices or a small splash of broth. Fold it into tortillas with crunchy cabbage, pickled onions, fresh herbs, and a little lime. This works particularly well for dry slices because the acidic toppings and added moisture balance the meat without requiring a large amount of sauce.
Brisket Mac And Cheese
Shred or finely chop the brisket and stir it into finished macaroni and cheese just before serving. Add a small amount of reserved brisket juice or broth if the meat needs moisture. The creamy sauce protects the brisket during reheating, while the smoky meat gives a simple pasta dish a second purpose.
Protecting The Bark On Smoked And Dry Brisket Slices
The bark is the most fragile part of leftover smoked brisket. Direct liquid softens its crust, while prolonged steam can turn a crisp exterior into a wet surface. If preserving bark matters, keep the slices above the liquid rather than sitting directly in it. Place them on a rack inside a covered baking dish, or use only enough liquid to create steam without bathing the meat.
Another effective approach is to separate the bark from the tender interior during repurposing. Chop the softer meat into tacos, hash, chili, or sandwiches, then reserve bark-heavy pieces to crisp briefly in a skillet or use as a topping. Do not expose already-dry brisket to prolonged high heat simply to recreate a crisp bark; the exterior can dry out faster than the interior can recover.
For the juiciest result, prioritize moisture. For the crispest bark, prioritize limited steam and a short finishing heat. Trying to maximize both at the same time can compromise one of them.
Food Safety
-
Cool promptly: Refrigerate cooked brisket within 2 hours of cooking or serving; if the surrounding temperature is above 90°F, refrigerate it within 1 hour. Divide a large amount into shallow containers so it cools more quickly rather than leaving a deep, hot mass to cool slowly.
-
Store airtight: Keep brisket in a tightly sealed container or well-wrapped package, ideally with its juices. Refrigerate at 40°F or below. Limiting air exposure helps slow drying and protects the meat from absorbing refrigerator odors.
-
Use within 3-4 days: Refrigerated cooked beef should generally be eaten within 3-4 days. When reheating leftovers, heat them thoroughly rather than repeatedly warming and cooling the same batch. If you will not use the brisket within that window, freeze it while it is still fresh.