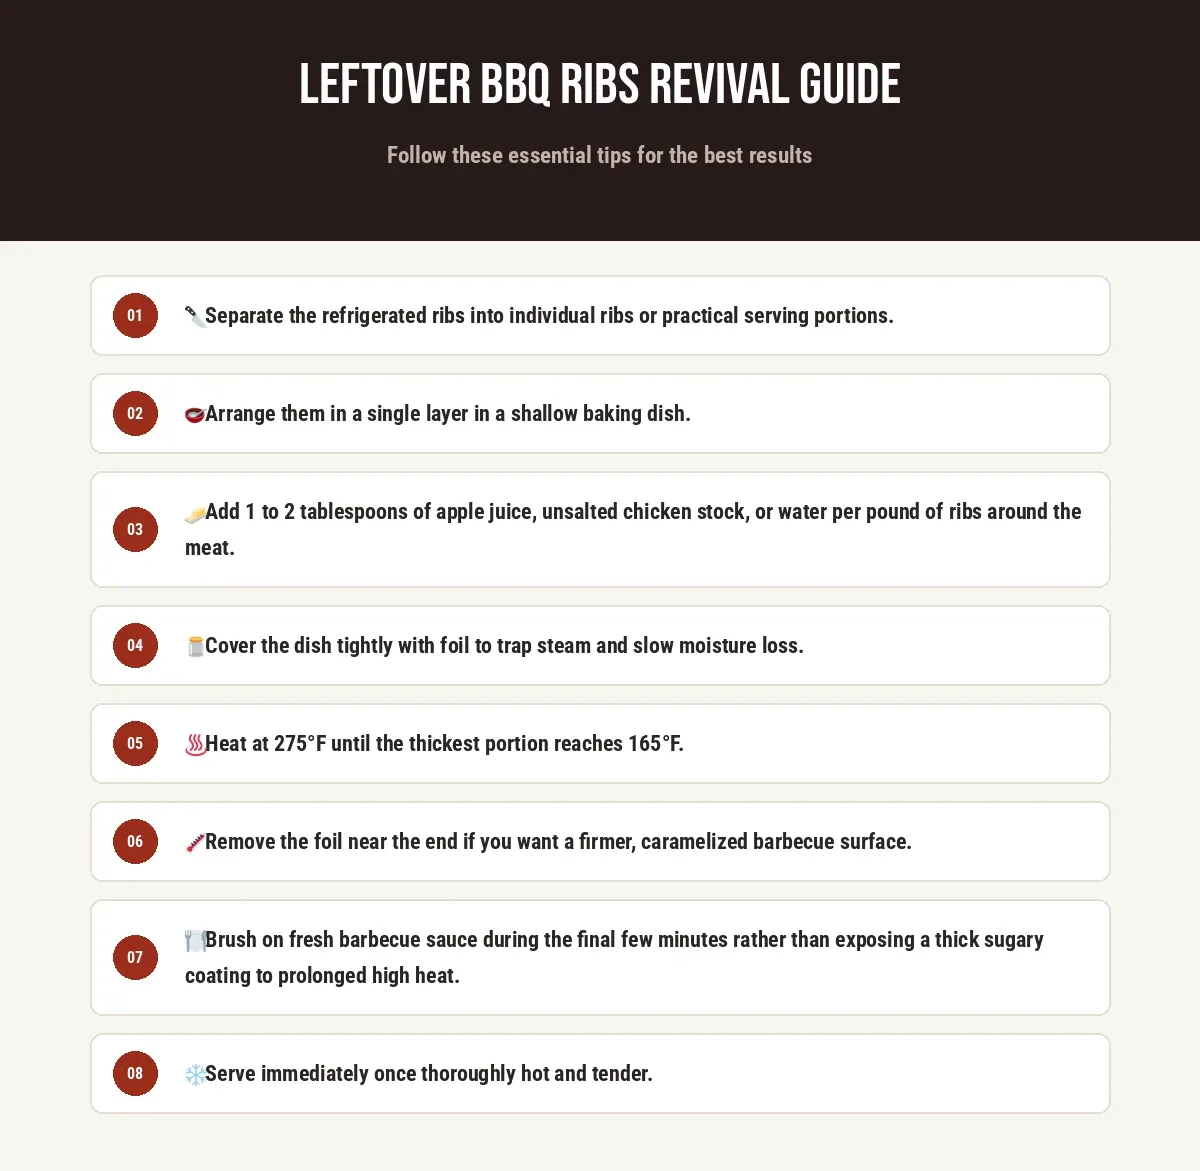
Leftover BBQ ribs can be excellent on day two, but only if you reheat them gently. The goal is not to cook the pork again. It is to warm the meat through while replacing some of the moisture that escaped during the first cook and subsequent refrigeration. A covered oven, a small amount of liquid, and moderate heat give you the best balance of tender meat, hot centers, and properly set barbecue sauce. Avoid blasting refrigerated ribs with high heat from the start; that approach can dry the meat before the middle is warm.
Why Leftover BBQ Ribs Loses Its Texture?
Ribs lose tenderness mainly because their muscle fibers continue to lose moisture during cooling and reheating. The original barbecue process already subjected the pork to prolonged heat, which changed its muscle proteins and rendered connective tissue into gelatin. Refrigeration then firms the rendered fat and gelatin, making cold ribs feel noticeably stiffer. When you reheat them too aggressively, water inside the meat turns to steam and escapes before the center has warmed, while the muscle proteins tighten further. The result is dry, chewy pork.
The barbecue sauce creates another problem. Sugars in the sauce can thicken during refrigeration and scorch when exposed directly to high heat. A little added liquid creates a humid environment around the ribs, while covering the pan slows evaporation. The liquid does not need to soak the pork; it should create enough steam to gently warm the meat and loosen the sauce. Apple juice, unsalted chicken stock, or water all work. For richer ribs, a small amount of melted butter can be added to the sauce rather than poured directly over the meat.
Step-by-Step Revival: A 3-step Guide
Step 1: Prep
Take the ribs from the refrigerator and separate them into individual ribs or manageable portions. Scrape away any large patches of hardened sauce only if they are excessively thick or charred; otherwise, keep the sauce because it helps protect the surface. Arrange the ribs in a single layer in a baking dish or shallow oven-safe pan. If the ribs are particularly meaty, place the thicker portions toward the center of the pan, where they will heat more gradually and evenly. Do not stack several cold layers together, because the center portion will take substantially longer to heat.
Step 2: Moisture
Add about 1 to 2 tablespoons of liquid per pound of ribs. Unsalted chicken stock is a neutral choice; apple juice adds mild sweetness, while water works when the ribs already have a strongly flavored sauce. Pour the liquid around the ribs rather than directly over their surfaces. Cover the pan tightly with aluminum foil. The liquid will generate gentle steam inside the covered pan, reducing evaporation and helping loosen refrigerated sauce and gelatin. For saucier ribs, brush on a thin additional layer of barbecue sauce during the final few minutes rather than coating them heavily before heating.
Step 3: Heat
For the most reliable result, reheat the covered ribs in a 275°F oven until the thickest portion reaches 165°F internally. This usually takes about 20 to 30 minutes for a small serving and 30 to 45 minutes for a larger portion, although thickness and starting temperature matter more than the clock. The ribs are ready when the meat is thoroughly hot, the sauce has loosened, and the meat feels tender when pressed with tongs rather than stiff or rubbery. If you want a slightly caramelized exterior, remove the foil after the ribs are hot, brush them with sauce, and return them to a 400°F oven or broiler briefly. Watch closely because barbecue sauce can burn quickly.
| Reheating method | Setting | Approx. time | 1-2 ribs | 3-6 ribs | 7+ ribs |
|---|---|---|---|---|---|
| Oven, covered | 275°F | 20-45 min | 20-25 min | 25-35 min | 35-45 min |
| Oven, covered then uncovered | 275°F, then 400°F | 25-45 min | Heat covered, then uncover for 3-5 min | Heat covered, then uncover for 5-7 min | Heat covered, then uncover for 5-10 min |
| Air fryer | 325°F | 8-15 min | 8-10 min; add a little sauce or liquid | 10-12 min; avoid crowding | 12-15 min in batches |
| Microwave, covered | Medium power | 3-8 min | 1-2 min, then 30-sec intervals | 3-5 min, turning once | 5-8 min, turning portions once |
For microwave reheating, place the ribs in a microwave-safe dish with a tablespoon or two of liquid, cover loosely with a microwave-safe lid, and use medium power rather than maximum power. Rotate or rearrange the ribs during heating so the outside does not become dry while the center remains cold. The microwave is convenient, but the covered oven generally produces a more even texture. Regardless of method, use a food thermometer when possible and heat leftovers to 165°F.
3 Simple Culinary Ideas To Repurpose Leftover BBQ Ribs
BBQ Rib Tacos
Pull the warmed pork from the bones and chop it into bite-size pieces. Toss it with a little of its existing barbecue sauce, then pile it into warm corn or flour tortillas with shredded cabbage, sliced avocado, pickled onions, or a crisp slaw. The acidic toppings balance the sweetness and richness of the barbecue sauce while adding freshness and crunch. This works particularly well when the leftover ribs are too dry to serve attractively as whole ribs because chopping distributes the sauce and moisture throughout the meat.
BBQ Rib Fried Rice
Remove the bones and chop the pork finely. Stir-fry cold cooked rice with vegetables such as peas, carrots, corn, or finely sliced cabbage, then add the rib meat near the end so it heats without becoming tough. Use a restrained amount of barbecue sauce as the main seasoning and add soy sauce only if the dish needs more salt. The small pieces of pork distribute their smoky flavor throughout the rice, making this a practical way to use a relatively small amount of leftover meat.
BBQ Rib Mac And Cheese
Pull the meat from the bones, chop it, and fold it into prepared macaroni and cheese. Add the pork after the cheese sauce is finished so the meat only needs to warm through. A thin drizzle of barbecue sauce on top provides acidity and sweetness, while sliced scallions or finely chopped pickles cut through the richness. This is especially useful for small amounts of leftover rib meat that are not enough for a full standalone serving.
Reviving Spare Ribs And Country-Style Pork Rib Meat
Spare ribs contain substantial bone and connective tissue, so they benefit particularly well from covered, moderate-temperature reheating. Give them enough time for the gelatin and rendered fat to soften again rather than trying to heat them rapidly. Country-style pork ribs vary considerably: some are cut from the shoulder and contain more fat and connective tissue, while others are leaner loin-based cuts. Shoulder-style country ribs tolerate gentle covered reheating particularly well; leaner pieces require closer attention because they can become dry faster. For either type, keep the added liquid around the meat, maintain a covered environment, and uncover only at the end if you want to refresh the barbecue crust.
Food Safety
-
Cooling time: Refrigerate cooked ribs within 2 hours of cooking or serving, or within 1 hour if the surrounding temperature is above 90°F. Divide a large amount into shallow containers so it cools faster rather than leaving a deep, hot mass at room temperature.
-
Airtight storage: Store ribs in clean, airtight containers or tightly wrapped packaging. Keep the refrigerator at 40°F or below. Airtight storage limits moisture loss, slows oxidation, and prevents the ribs from absorbing odors from other foods.
-
Safe fridge days: Use refrigerated cooked ribs within 3 to 4 days. Reheat only the portion you plan to eat; repeatedly cooling and reheating the entire batch increases quality loss and creates unnecessary food-safety handling.