How to Reheat Roast Duck So the Skin Stays Crispy
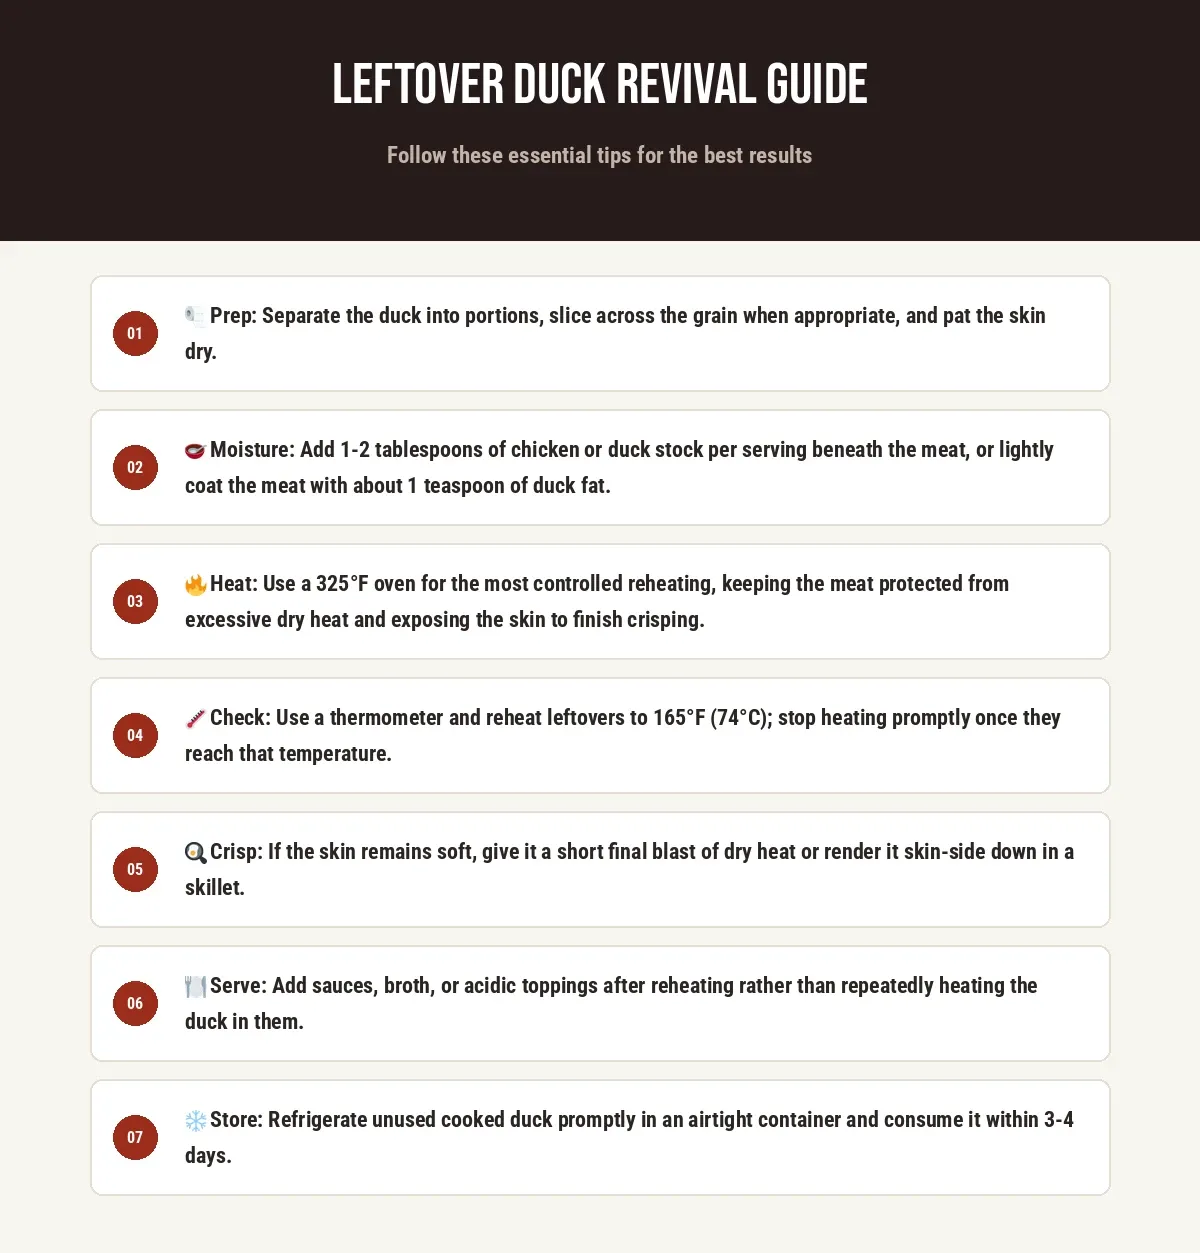
Leftover duck is worth saving because it already contains concentrated flavor, rendered fat, and a deeply seasoned surface. The problem is texture. A freshly cooked duck can have crisp skin, tender meat, and juicy connective tissue; after refrigeration, those qualities become harder to restore. The key is to reheat the meat gently, add moisture where the flesh needs it, and expose the skin to enough dry heat to crisp it without overcooking the meat.
Treat the duck as two different foods: the meat needs protection from drying, while the skin needs dry, intense heat. If you reheat everything aggressively in one pan or microwave, the skin usually turns soft while the meat becomes firm and dry. Separating the two jobs produces a much better result and lets you use smaller portions without reheating the entire batch.
Why Leftover Duck Loses Its Texture?
Duck meat loses its fresh-cooked texture mainly because refrigeration and reheating redistribute and remove moisture. During the original cooking process, muscle proteins contract and squeeze out some water, while connective tissue gradually converts to gelatin. Once the duck cools, its juices thicken and redistribute through the meat. Refrigeration also causes the fat to solidify, making the meat seem firmer and less succulent even when it has not actually lost all of its moisture.
The bigger problem comes during reheating. Heat causes muscle proteins to contract again. If the duck is heated too quickly or to too high a temperature, those proteins squeeze out additional water, leaving the slices noticeably drier and chewier. Thin slices are particularly vulnerable because they have a large surface area relative to their volume and can lose moisture rapidly.
The skin behaves differently. Duck skin contains a substantial layer of rendered fat beneath the skin and relatively little water compared with the meat. After chilling, that fat solidifies and the skin loses its brittle structure. Moist reheating softens the skin further. To restore crispness, the skin eventually needs direct, dry heat that melts the fat and drives surface moisture away.
For that reason, the best revival method is controlled rather than simply hot. Warm the meat with a small amount of liquid or duck fat, keep the skin exposed whenever possible, and stop heating as soon as the meat is hot throughout. For leftovers, the food should reach 165°F (74°C) for safe reheating.
Step-by-Step Revival: A 3-step Guide
Step 1: Prep
Remove the duck from the refrigerator and separate large pieces from thin slices. If the duck has skin, keep the skin attached to the pieces you want to crisp, but arrange them so the skin is facing upward when using an oven or air fryer. Pat the skin dry with paper towels. Surface moisture is the enemy of crisp skin because it must evaporate before browning and crisping can occur.
If the duck is heavily coated in a thick sauce, scrape off excess sauce before dry reheating. Save that sauce for serving instead of allowing it to burn onto the duck. For plain duck meat, slice it across the grain if it has not already been sliced. Smaller, evenly sized portions heat more predictably and require less time than reheating a whole piece.
Letting refrigerated duck sit at room temperature for a long period is unnecessary and increases food-safety risk. Prep it promptly, then move directly to reheating.
Step 2: Moisture
Use low-sodium chicken stock or duck stock as the primary moisture source for plain duck meat. Add only a small amount: roughly 1-2 tablespoons for a single serving of sliced duck. The liquid should sit beneath or around the meat rather than soaking the skin. Covering the pan or dish briefly traps steam and warms the meat gently, limiting further moisture loss.
For especially rich duck, rendered duck fat is another useful option. Use about 1 teaspoon per serving and brush or spoon it lightly over the meat. Duck fat does not replace water, but it coats the surface, improves the perception of juiciness, and helps protect the meat from harsh dry heat.
If using an oven, put the duck in a small baking dish with the stock underneath, cover the dish loosely with foil, and leave the skin exposed if crispness is important. If using a skillet, add the stock to the bottom of the pan and cover it briefly. Never pour liquid directly over skin that you intend to crisp.
Step 3: Heat
For the best balance between juicy meat and crisp skin, use a 325°F oven, preferably with the duck arranged skin-side up. Heat covered or loosely tented for the initial warming period if the meat is very lean or dry, then uncover and continue until the skin is crisp. For thin slices, avoid prolonged heating; they can become dry before the surface has time to improve.
The ideal duck should feel hot in the center, remain supple when pressed, and release some moisture when cut rather than feeling tight and fibrous. The skin should be visibly dry and crisp, with rendered fat appearing at the surface. For food safety, leftover duck should reach 165°F (74°C) internally. A food thermometer is more reliable than judging temperature by appearance alone.
| Reheating method | Typical setting | 1 serving | 2-4 servings | Best use |
|---|---|---|---|---|
| Oven | 325°F | About 10-15 min | About 15-25 min | Best overall balance; cover meat initially and uncover skin to crisp |
| Air fryer | 325-350°F | About 4-7 min | About 6-10 min | Fastest route to crisp skin; check thin slices early |
| Skillet with stock | Low to medium-low | About 4-6 min | About 6-10 min | Best for sliced meat; add 1-2 tbsp stock and cover briefly |
| Covered microwave | 50-70% power | About 1-2 min, checking every 30 sec | About 2-4 min, checking frequently | Best for speed; use a dampened paper towel or small splash of stock and crisp skin separately |
| Whole larger piece, oven | 325°F | About 15-25 min | About 20-35 min | Best for larger portions; use a thermometer and avoid prolonged high heat |
Times vary with thickness, starting temperature, bone-in versus boneless cuts, and the amount of duck being reheated. The thermometer should determine when the food is safely reheated; the clock is only a guide.
3 Simple Culinary Ideas To Repurpose Leftover Duck
Duck Fried Rice
Dice the duck and add it near the end of a fried-rice preparation so it heats without becoming tough. Cook cold, day-old rice separately with vegetables, egg, and a small amount of soy sauce, then fold in the duck once the rice is hot. Crisp pieces of duck skin can be chopped finely and scattered over the finished rice for concentrated flavor. If the duck is already strongly seasoned, reduce the soy sauce rather than trying to balance excess salt afterward.
Crispy Duck Tacos
Shred or thinly slice the meat and crisp it briefly in a dry skillet, using a little reserved duck fat if the pan is completely dry. Build the tacos with something acidic and fresh, such as cabbage dressed with lime juice, along with salsa, herbs, or sliced vegetables. The acidity cuts through the duck’s richness while the crunchy toppings replace some of the texture lost during refrigeration. Keep any crisp skin separate until serving so it does not soften against wet toppings.
Duck Noodle Soup
Turn the duck into a quick broth-based meal rather than repeatedly frying it. Warm stock with ginger, garlic, mushrooms, greens, or other vegetables, then add cooked noodles. Put the duck into the hot broth only during the final minute or two, just long enough to warm it. This protects the meat from prolonged heat while the broth supplies the moisture that reheated duck lacks. Add crisp duck skin immediately before eating rather than simmering it in the soup.
Managing Rich Fat Rendering On Leftover Duck Slices
Cold duck often carries a thick layer of solidified fat. Do not automatically discard it: that fat is useful for roasting potatoes, sautéing vegetables, frying eggs, or enriching sauces. First, separate obviously excessive solid fat from the meat if the slices feel greasy. Leave a thin coating where practical because it helps protect the meat during reheating.
For slices with intact skin, place them skin-side down in a cold or barely warm skillet and gradually raise the heat to medium-low. The slow start gives the fat time to render before the skin becomes overly dark. Once the skin is crisp, transfer the duck to a plate and use the rendered fat for another component of the meal. Avoid high heat from the beginning; the exterior can scorch before enough fat has rendered.
If using an oven or air fryer, blot excess surface fat first. A small amount will render naturally during reheating. Drain the rendered fat from the cooking tray once it has cooled enough to handle safely, then strain and refrigerate it in a clean, covered container if you intend to reuse it. Keep the fat separate from the duck’s perishable meat and discard it if it develops an off smell, mold, or other signs of spoilage.
Food Safety
-
Cooling time: Refrigerate cooked duck within 2 hours of cooking or serving, or within 1 hour when the surrounding temperature is above 90°F (32°C). Divide a large quantity into shallow containers so it cools quickly rather than leaving a deep container of hot duck to cool slowly.
-
Airtight storage: Store duck in a clean, airtight container or tightly wrapped package to limit moisture loss, odor transfer, and exposure to contamination. Keep the refrigerator at 40°F (4°C) or below. Store rendered fat separately when possible.
-
Safe fridge days: Use refrigerated cooked duck within 3-4 days. Reheat only the portion you plan to eat, bringing it to 165°F (74°C). If it has been refrigerated longer than four days, or if there is any doubt about how long it remained at unsafe temperatures, discard it rather than relying on smell or appearance.